
Zombies Arent Real Beginner Guide: First City
How to survive your first Zombies Arent Real run: read the planning phase, spend the first budget, place garrisons and hold a safe zone until civilians hit 10%.
Your first run in Zombies Arent Real is not a tutorial that holds your hand. The game drops you over a real city, gives you a budget, and starts the clock. Everything after that is a negotiation between three numbers: how much money you have, how much ground you can cover, and how many civilians are still alive.
This beginner guide assumes the launch build and the standard difficulty. It walks through the planning phase, the first fifteen minutes of spending, and the single habit that separates a lost run from a won one: building backwards from the civilians instead of forwards from the zombies.
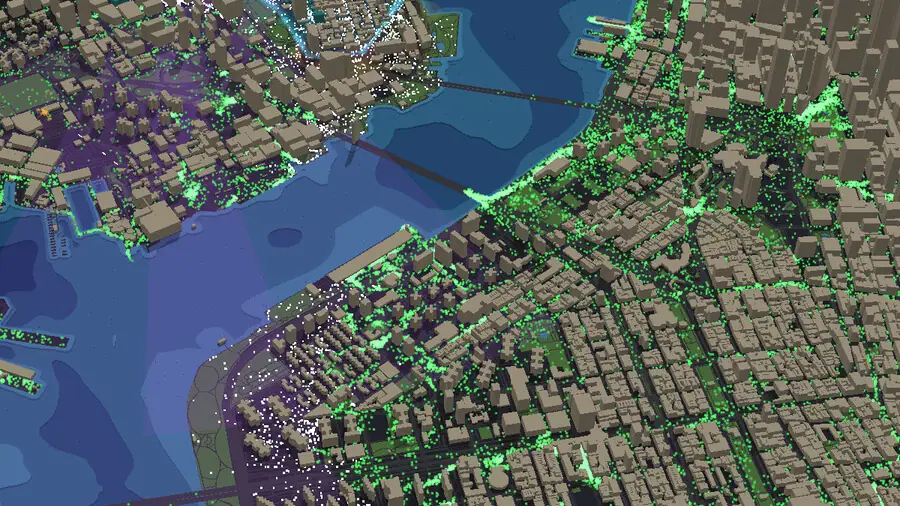
The planning phase is the whole game
Before the first zombie walks, the game gives you a deployment window with the full map revealed. You can see the infection markers, the road network, the water, and the buildings. This is when the deploy bar is open and your money still exists.
Treat that window as an exam, not a menu tour. Three questions in order:
- Where is the infection coming from? The purple blocks show which districts are already compromised. Those districts will produce zombies. They are not your defense line; they are the direction the pressure arrives from.
- Where are the civilians? The stats overlay tracks
Civilians Leftas a percentage of the starting population. The win banner asks for 10% saved, so the civilians near your spawn matter more than the ones across the river. - What connects them? Rivers, bridges, wide avenues and narrow side streets decide how the horde moves. A bridge is worth more than a wall, and it costs less.
Once you can answer those three, the budget spends itself. If you cannot answer them, do not press ready — a bad plan with $9,000 is worse than a mediocre plan with $9,000 and one decision changed.
Read the deploy bar before you buy anything
The bar is not a shop with equal options. It is sorted by role whether or not it says so:
| Slot | Item | Launch price | What it actually does |
|---|---|---|---|
| 1 | Garrison | $15+ | Puts infantry in a building; cheap bodies that hold a doorway |
| 2 | Mortar | $270 | Indirect fire, 160-630 m range, 40 m blast, 4-round magazine |
| 3 | Sniper | $35 | Single-target damage at long range from a roof |
| 4 | Spikes | $1.00 | Stops movement on a spot for almost nothing |
| 5 | Turret | $90 | Sustained fire on one line |
| 6 | Mine Field | $200 | Area denial that kills without needing line of sight |
| 7 | C4 | $500 | Demolition, best saved for a structural problem |
Civilian tools sit next to the military ones: [Q] Corridor $0.40/len and [E] Hold $0.80/rad. Building tools are on the same bar: [B] Safe Zone $1.00/cell, [K] Wall, [F] Fortify, [G] Gate.
The garrison price ends in a plus sign because it scales as you buy more. Everything else on that row has been a flat price in the launch build. That single plus is the reason garrisons are the backbone of early spending: the first ten are almost free, and the eleventh still costs less than half a sniper.
Spend the first budget in three passes
Do not fill the map in one sweep. Spend in passes, and let the map tell you what the next pass should buy.
Pass one — the spine. Two or three garrisons on the buildings that sit between the infection and the civilians. Not the buildings nearest the zombies; the buildings nearest the people. A garrison in the wrong block dies for nothing.
Pass two — the one big gun. Pick either a mortar or a turret, not both. A mortar covers a radius and punishes clumps; a turret covers a line and punishes a single approach. On a map with one obvious bridge, the turret is the cheaper answer. On open waterfront, the mortar earns its $270.
Pass three — the cheap stuff. Spikes at a dollar each are the best value in the game for slowing a push, and a corridor line for forty cents per length is how you tell civilians which way to run. Neither wins a fight. Both buy the seconds that a sniper needs.
If you have spent more than half your budget before the first wave, you have probably overbought. Refunds exist ([X] Refund on the selected unit), but the time you spend refunding is time the horde spends walking.
The 10% rule changes what winning means
The top banner in the deployment UI reads CIVILIANS SAFE: 2% - NEED 10%. That is the pass mark: 10 percent of the city's civilians saved. It is deliberately low, and that is the design telling you something. You are not supposed to hold every district. You are supposed to hold a corridor long enough for a fraction of the population to get out.
That reframes every early decision:
- A perfect kill count with 4% saved is a loss.
- A messy, expensive fight with 12% saved is a win.
- Zombie health rises between missions (the overlay showed
Zombie Health 2on one map and4on another), so the same layout will not carry you forever.
Push civilians first, kills second. The score screen agrees with you: the game scores rescued civilians, not bodies, and the store page is blunt about the tone it wants: losing is fun, and the city is not supposed to survive intact ↗.
Nothing attacks until you press ready. If the layout still feels wrong after spending the budget, use REFUND ALL, place again, and only start when the three questions above have answers.
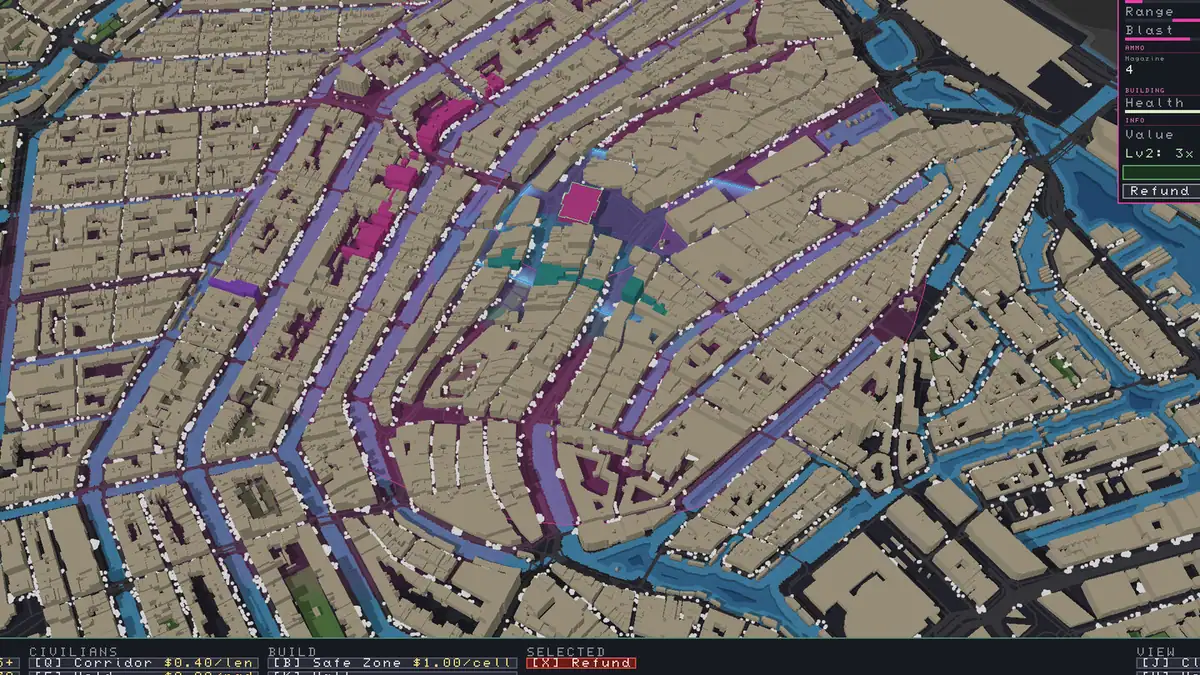
Three habits that carry a run
Build backwards. Start at the extraction point and walk outward. Every unit you place should be between a zombie and a person. If a unit is only between a zombie and empty pavement, it is a luxury.
Keep one unit in reserve money. A banked $90 is a turret you can drop the moment a push goes somewhere you did not predict. A spent $90 is a turret in the wrong place. The refund button exists because the designers expect you to move things; it is not a sign you planned badly.
Watch the stats overlay, not the fight. Civilians Left, the zombie count and Kills Per Unit Total tell you which of your purchases is actually working. If a turret reads 0.0 kills while everything else is climbing, it is aimed at nothing and you should move it.
Once those habits are automatic, the next step is not more units. It is a layout that does not need you to babysit it. That is what the three-layer defense setup → is for.
Official source: Steam store page ↗ · Steam Community hub ↗ · SteamDB ↗
FAQ
Is Zombies Arent Real a wave shooter or a strategy game?
It is a horde-defense strategy game. You place garrisons, snipers, mortars, turrets, spikes, mines and C4 on a real city map, manage a budget, and try to hold long enough for civilians to escape. There is a planning phase before the fighting and you can adjust placements mid-run.
How many civilians do I need to save?
The launch build's banner asks for 10 percent saved. Below that the mission reads as a loss even if you killed most of the horde, and above it the score keeps climbing with every civilian you get out.
How much money do I start with?
The deployment screen in the launch build showed a budget in the $9,000 range for the starting mission, with unit prices from $1.00 (spikes) to $500 (C4). Budget scales with the mission, so treat the number as a starting point and read the bar each time.
Should I buy a mortar or a turret first?
Buy the one that matches your map's geometry. A single bridge or a narrow street favors a turret because everything walks into one line. Open waterfront and plazas favor a mortar because the blast catches clumps that a turret can only shoot one at a time.
Do I need to kill every zombie to win?
No. Clearing the horde is the ideal outcome, but the mission's stated condition is civilians saved. Running a corridor out of the district and letting the rest of the city fall can be the correct play, and the game says as much in its own store description: losing is part of the design.